
I have created a new website with my own domain at photoshumi.com so if you look here regularly, please update your bookmarks. I will not be updating this blog anymore. The reason being is that it's a little annoying having a blog and a portfolio at different locations and I the new site is much more intuitive and a little more aesthetically pleasing.
Thanks.
Tuesday 9 September 2008
NEW SITE - PHOTOSHUMI.COM
![]()
Thursday 4 September 2008

Tuesday 2 September 2008
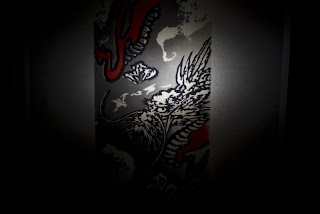
Day 2 : Part 2 - Osaka

A crossing for people and people crossing each other.

Stranded, she once felt alone.


The same crossing but one for mechanical serpents.

A meal and mirror and we can smile.


![]()
Monday 1 September 2008


Book Review : The Photographer's Eye - Michael Freeman

This leads me to a book that really balances out a few things for me as a "trained" artist, Michael Freeeman's The Photographer's Eye. This book covers aspects of photography not usually written about and if they are, I doubt they'd be as specific and readable as this, although I hear Learning To See Creatively by Bryan Peterson is also a great and informative read. The Photographer's Eye covers different aspects of composition and how framing, design, shapes, light, colour, intent and process are all connected and can be utilized to produce better photos that convey meaning and relevance to the photographer and more importantly, the viewer.
This is not a book about your camera, it's not a how-to book, it's not a dummies guide to taking photos. What it is is a book to explain to you the art and design of image making and how people read them. Michael Freeman writes and conveys his ideas easily, even if your new to composition. The cool thing for me is that it's helped me think about my intent before pressing the shutter, I feel better as a photographer when I don't delete half the photos I took as they don't aesthetically work. This book also isn't a one off read and will be a great reference guide. I can't wait to read it again in a few months as I let the information slowly digest, in the meantime, I'll be reading Master Lighting Guide for Portrait Photographers by Christopher Grey. It looks a little full on but I'll jump in and see what it offers as I want to get more into lighting and portraiture work.
![]()
Sunday 31 August 2008
Super Takumar 105mm 2.8 & some filters
I've been in Osaka for the past few days traveling with and visiting friends. One of my main goals was to take a few street photographs to overcome my fear/embarrassment of shooting in the street. The second mission was to finally track down Osaka's camera shops, especially the second hand ones.
At one of the shops (Yaotomi Camera), I bought a decent conditioned Super Takumar 105mm f2.8 for a very good price. Optically, it's very good with a few dust spots but no fungus or scratches. The body of the lens is slightly worn but no heavy scratches or dents and well worth it for ¥5,100 ($46.00 USD). I'm pretty excited to have this lens as I've seen some great photos taken with it and it also fills the gap in my Takumar collection between the 55mm and the 135mm. Now I only really need the $85mm.
At another shop (kitamura), I found some second hand 49mm filters all in excellent condition for my Takumar lenses and they were all under ¥800 ($7.30 USD). In the below image, the first filter is an Asahi Pentax YG filter which I'm guessing is for B&W film photography. I bought it anyway because it was pretty old and in great condition with original case, on a DSLR it will just cast a yellow / green on the image, so I'll probably never use it. The second filter is a Kenko Circular PL which are very cool to use, a must have for the outdoors. I had a circular PL for my Pentax FA 28-105 and used it often and was happy to find one cheap for my Takumar lenses.
In the next photo, the first filter is a Kenko MC Protector which I'll leave on the Super Takumar 35mm 3.5 and the second filter is a Kenko MC Skylight 1B which balances colour outdoors.
I will post more information soon on camera shopping in Osaka with directions, maps and other information. I'll also post some photos taken with the Super Takumar 105mm 2.8.
![]()
Day 1 - The Freeway to Osaka

A truck crashes on the highway, spilling oil. Rescue Crew arrive.

Contemplating the work ahead.

People, curious and frustrated

The media, reporting to the masses from above.

The landscape as boredom sets in.

Sleeping, waiting.

Back in the land of the moving, the city awaits us.

Performers, he's playing just for me.

Yoko, playing with light at the end of a long day.

![]()
Thursday 28 August 2008
Sayurichan

Super Takumar 55 mm 1.8 : f/2.8 : ISO - 100 : Shutter - 1/180
My friends recently had their first born and I offered my humble photographic skills to take some photos of baby Sayuri, mum and dad. This was also a great opportunity to test out the Vivitar 285HV, on and off camera. This photo used some nice ambient light coming through the window and I bounced the flash with the diffuser to light baby Sayuri's cute little face.
Techie shit aside, I really like this photo as it captures wonderfully what a new parent must feel. Here, new dad emits love, warmth and protection.
![]()
Wednesday 27 August 2008
From the Haze

Super Takumar 55 mm 1.8 : f/1.8 : ISO - 100 : Shutter - 1/500
Just showing off the beautiful bokeh created by the Super Takumar 55mm 1.8, though the subject is nothing to drool over, it's easy to get lost in the creamy background.
![]()
Monday 25 August 2008
2 in 1 DIY Snoot & Grid Spot
After reading the many cool DIY reader projects at diyphotography.net I saw a cool idea for a cheap and easy DIY snoot for my Vivitar 285HV. So since I have nothing but time on my hands lately, I decided to make one although mine looks different and is much bulkier. I basically used 5mm foam board from Japan's infamous ¥100 stores ($1 USD), cut out the shape and taped it together. Realising it was way too bulky to be transportable, I decided to add a DIY grid spot that fits inside the snoot with relative ease. I made the grid spot out of corrugated plastic craft stuff, cut it to size, glued it together and then taped it up.


So yeah, it looks a little ridiculous, fair enough but it seems to do the job.
With snoot + grid spot


With snoot + grid spot
So there you have my 2 in 1 DIY snoot and grid spot for my Vivitar 285HV, for home use it's fine and I'm looking forward in testing it out more thoroughly, especially for moody portraits. When and if I refine this model I want to take a more aesthetic & practical angle, kinda like on this blog. In the near future I'll make a speed strap and a bounce card / diffuser which should be relatively easy and also the DIY soft box.
![]()
My Beauty Queen

Lensbaby 2.0 : f/2.8 : ISO - 400 : Shutter - 1/45
Over at PentaxForums there are threads on different lens clubs, eg; Takumar Club and the Soviet lenses Club and recently there's a new Lensbaby Club. After looking through the thread and adding my thoughts and images I realised how little I actually use my Lensbaby. This image isn't actually new but it's an ode to my Lensbaby and a pledge that I'll use it more often.
![]()
Saturday 23 August 2008
Chef's Hat - A Diffuser For The Vivitar 285HV
The free gift diffuser which came with the Vivitar 285HV was a pain in the arse to setup so I was looking at some diffusers to buy online but they were all about $30 and didn't want to piss the wife off too much as I think my little photography related spending spree is officially over!
So while stalking another local camera shop in Fukuyama I found a pretty cool diffuser that comes in M and L sizes which basically just sits over the flash head quite snuggly and happens to look just like a chef's hat! Surprisingly, this product is made by Kenko and re-branded as Harbor and costs ¥840 ($7.60 USD) for the L size and a few dollars less for the M, very cheap.


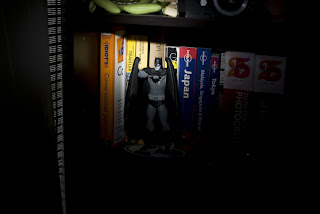
Here are some examples of Batman posing just for me.


![]()
Subscribe to:
Posts (Atom)


